Poha Chivada


iSaltPepper:Poha-Chivada


During these days of the pandemic, we are spending a lot of time in the kitchen. Since all family members are at home and there are fewer food resources available, we are always struggling to find the answer to the question "What to cook now"?   On top of that if you are busy with your work from home and kids have finished their online school and are hungry, we tend to give them some readymade food.  Many times "junk food" like chips/cookies.  Instead of that try this poha-chviada which is less oily and made from rice-flakes (poha)  And you can make as spicy as you and your kids will love to have. It's very easy and takes hardly 20 mins to make. Your kids will definitely like this crispy snack.


Ingredients:

  1. Thin poha - 250 gm
  2. Peanuts (unroasted, unsalted) - 3 tablespoons
  3. Green chilies - 4 - 5
  4. Curry leaves - 10 - 12
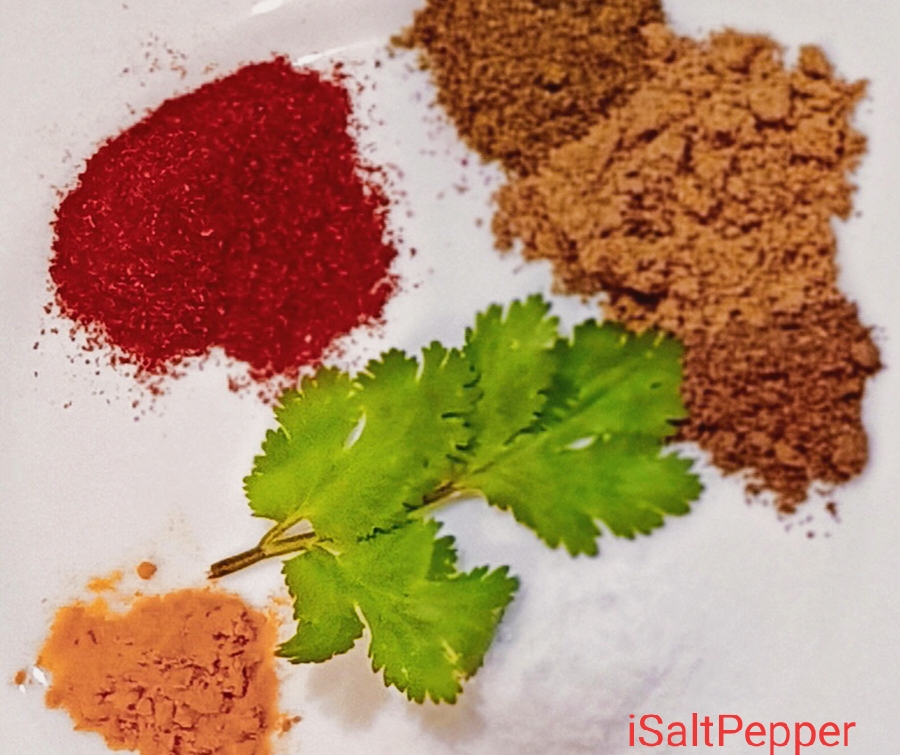
  5. Chili powder - 2 tablespoons
  6. Salt - As per taste
  7. Turmeric powder - 2 teaspoons
  8. Mustard seeds - 1 tablespoon
  9. Sugar - 1 teaspoon
  10. Oil - 4 Tablespoons

Procedure:

  1. First, take poha (rice flakes) in a pan and dry roast on medium heat for 5 mins. This makes poha crispy.
  2. Take oil in a properly big pan (big enough to stir all poha together )  and put it on heat.
  3. Once the oil starts heating, first add peanuts in it as peanuts take longer time to fry. Keep stirring for 3 mins.
  4. Add mustard seeds and let them splatter. Then add green chilies and curry leaves. Make sure chilies and curry leaves are fried till they become crispy.
  5. Add a pinch of turmeric in the oil. We are not adding all the turmeric powder as it may burn.
  6. Now add roasted poha, chili powder, remaining turmeric powder, salt, and sugar. Mix everything well.
  7. Keep stirring for almost 10 mins. Switch off the heat.
  8. Your chivada is ready.  Let it cool for 1 hour. Then store it in a dry, airtight container.  
  9. Enjoy chivada with evening tea. :)


Peas Patties


iSaltPepper: Peas Pattice

Green peas are very nutritious and easily available everywhere. Till now if you are not a fan of peas, try this dish of peas patties. Picky eaters in my house like it. You will also like it !! Definitely !!


Ingredients: 

iSaltPepper-PeasPatties-Ingredients
iSaltPepper: Peas Patties- Ingredients
  1. Boiled peas - 1cup
  2. Boiled potatoes - 8 - 10  medium size
  3. Finely chopped onion - 3 medium size
  4. Grated coconut - 1 cup
  5. Chopped coriander - 1/2 cup
  6. Ginger-garlic-green chili paste - 2 tablespoons
  7. Chili powder - As per taste
  8. Garam masala - 1 teaspoon
  9. Coriander powder - 2 teaspoons
  10. Jeera powder - 1 teaspoon
  11. Jeera - 1 teaspoon
  12. Asafoetida (Hing) - 1/2 teaspoon
  13. Oil - 2 tablespoons  +  for shallow frying
  14. Salt as per taste
  15. Turmeric powder - 2 teaspoons
  16. Cornflour

Procedure:

  1. Mash boiled potatoes, add some salt and 1 teaspoon turmeric powder and mix evenly.
  2. In a pan, take 2  tablespoons oil, once it is hot, add jeera and asafoetida (hing).
  3. Add ginger-garlic-chili paste in oil, fry well.
  4. Add onion and fry till becomes translucent.
  5. Add chili powder, coriander powder,  jeera powder, garam masala,  and salt as per taste. Fry well till all mixture becomes dry and leaves oil from sides.
  6. Strain boiled peas to remove all water and add in the onion. Mix and fry well.  
  7. Lastly, add grated coconut and chopped coriander. Mix well and remove from heat.  
  8. Let it cool for at least 10 mins.
  9. Make small patties of potatoes as shown in the picture. Use some cornflour for dusting so that patties don't become sticky. 
  10. Take one patty at the bottom, place peas-onion mixture on it, place another patty on top of it.  Join the sides by hand.  Make rest all patties like this and then shallow fry on a pan.
  11. Serve hot with ketchup, green chutney, and a salad of your choice.


iSaltPepper: Peas Patties - Peas, onion mixture


iSaltPepper: Peas Patties - step 1


iSaltPepper: Peas Patties - Step 2


iSaltPepper: Peas Patties - Shallow Fry


iSaltPepper: Peas Patties


Prawns Curry


iSaltPepper: Prawns Curry with Chapatis


Being born in a vegetarian eating family, I know nothing about non-vegetarian food and never thought that I will ever cook it in my life. My husband introduced me to non-vegetarian food and a new world of food opened to me. I liked it, so I started to cook it.

Today I am going to share with you a recipe of Prawns curry. There are many different ways in which prawns or any type of fish are cooked in India. But among all other Indian curries and their recipes I know and have tasted, this prawns curry is the easiest recipe to do and is my most favorite.  Let's see how to make it!

Ingredients

  1. Raw prawns (fresh or frozen)
  2. Garlic - 6 or 7 cloves
  3. Grated coconut - 1/2 cup (If it is frozen heat in the microwave for 1 min). 
  4. Kokum - 3 pieces or Tamarind - 1.5-inch piece or Lemon - 1/2
  5. Coriander  - Finely chopped, 1/2 cup
  6. Green chilies - 2
  7. Chili powder - 3 Teaspoons
  8. Salt
  9. Garam Masala - 1 Teaspoon  (optional)
  10. Turmeric powder - 1 Teaspoon (optional)
  11. Oil - 3 Tablespoon
  12. Water - 2 cups
iSaltPepper - Prawns Curry Preparation


iSaltPepper - Mixed ingredients before boiling

Procedure

  1.  Peel and wash prawns and marinate with little chili powder, salt, and turmeric powder. Keep aside.
  2. Cut garlic into small pieces.  Make a fine paste of garlic, coriander, green chilies, and coconut.
  3. In a pan, take above paste made in step 2, prawns, and kokum. Add chili powder, salt, and turmeric powder. Also, add 2-3 pieces of kokum. If you don't have kokum, you can use tamarind or lemon juice. Add oil and water.  Mix everything stirring lightly.
  4. Keep on medium flame/power and let it boil for 8-10 mins.  Switch off the gas.
  5. Prawns curry is ready. Serve it hot with Rotis/chapatis and rice.


Pure Ghee


iSaltPepper: Pure Ghee

Pure ghee, means clarified butter. An important ingredient used in Indian Gastronomy. Lots of Indian dishes are cooked using ghee. Some of these dishes can be cooked without ghee also. But ghee makes them delicious. Health-conscious people try to avoid ghee as it has lots of saturated fats. Definitely, it should not be eaten in excess. But if it is eaten in controlled portions, it has lots of advantages for your health.
We all know the traditional process of making pure and tasty ghee at home. We have grown up seeing our grandmothers and mothers making ghee in the traditional way. But it is time-consuming. In today's fast-paced world it is always not possible to follow that method of making ghee. And if you are living in foreign countries with different weather conditions, different kinds of milk processed in a different way available in markets, then the end product of ghee doesn't come out as expected.  That's why I am sharing below my simple method of making ghee using butter available in any supermarket.  I use ghee made by this method for all my cooking like making laddus, sweet sheera, to apply on rotis/ chapatis and to eat with rice or khichadi.  It tastes delicious.  It's very easy and is done in 15 mins.

Ingredients:

1. 2 packs of unsalted butter available in any supermarket

Pure Ghee

Method:

1. Take bricks of butter in a pan
2.  Keep the pan on slow flame/power
3. Butter starts melting, keep stirring intermittently.
4. Once all butter is melted it starts getting clarified.
5. Switch off the gas before it starts boiling. Otherwise, its color will become brownish.
6. Strain the melted butter with a strainer and let it cool. Pure ghee is ready.
7. Store it in a dry jar. 

How To Setup Kitchen For Indian Cooking?

isaltPetter: Indian Kitchen Setup

In 2001, for the first time, I moved out of India. For my work, I was relocated to a small town on Lake Constanz, on the southern border of Germany.  It was an astonishingly beautiful place amidst three beautiful countries Germany, Switzerland, and Austria.  Nature was at its best. But the food was a cultural shock. Though I was trying to adapt to the food available there, I was badly missing Indian food. In that small town, there was only one Video Cassete library run by an Indian person, who also use to sell some Indian groceries in the basement of his shop. So, the supply and choice of Indian groceries were limited. That was the time when my adventure of Indian cooking as an inexperienced cook in a foreign country was started.  After that, I moved to multiple countries and lived there. But everywhere what I learned is that setting up your kitchen should be the first task wherever you go. And if you have small kids with you then you have to do it asap.

So here are some tips to set up your kitchen quickly. We can say that a kitchen is well equipped if it has all the required utensils and the groceries/ingredients required for cooking. According to me for Indian cooking, the most important utensils are

  • A wooden/fiber round board (Polpat in Marathi) for making rotis/chapatis,
  • A belan 
  • A pressure cooker. 

Nowadays many people use different types of electric rice cookers.  But I like to use a pressure cooker. Using a pressure cooker, we can cook many things at a time. I always bring these three things from India. Also, a set of 2-3 different types of cooking pans is needed, but those are generally available in any rental house.  If you are not sure about it, you can find out more about it in advance, whether basic utensils will be available in the house or not.


Required basic groceries include

  • Rai
  • Jeera
  • Turmeric powder
  • Chili powder
  • Garam masala
  • Asafoetida (hing)
  • Tea powder
  • Toor dal
  • Rice
  • Wheat flour.
If you can manage to bring these things in a small amount in your luggage then well and good. Otherwise, you will have to make one trip to some Indian grocery shop to start cooking after you arrive in a new country.

Apart from this you also need

  • Salt
  • Sugar
  • Oil 
  • Fresh Vegetables

which are always available in any grocery shop in any country. With these things in your kitchen, you can start basic cooking. You can enhance it later anytime.

Keeping this small list handy, setting up a kitchen will be easy. What do you think? Let me know in the comments.


Why iSaltPepper ?


You all might be wondering why the name is iSaltPepper? Well, salt and pepper are the main ingredients of Indian cuisine. We all know that.  So, I wanted the name of my blog to be SaltPepper. But obviously, it is very common and it's very difficult to get a domain name with only "SaltPepper" in it and required some modification. Since this blog is mainly about Indian cooking, I added "i" at the beginning of SaltPepper and I got a unique domain name for my Blog. So the name is "iSaltPepper".  It has nothing to do with "Apple" or "Iphones"  and so on.. .

Why am I writing this blog?

Because writing is my hobby. Whether cooking is my hobby or not is still a question! But I cook, I cook every day!! And I like to share food with others. In these days of social distancing, if not food then at least recipes 😉. I am not a great cook, and these are not my own recipes. I have learned those from others, from my mother and other ladies in the family, from friends, relatives, TV shows, magazines, recipe books and the internet. This blog is just a collection of Indian recipes that can be done in other countries where limited Indian grocery is available.

Feel free to share this blog with your friends.


Vada-Pav

Ingredients

  1. Ginger - 2 inch
  2. Garlic - 7-8 cloves
  3. Green Chillies - ( 4-5)
  4. Potatoes (8 medium-sized)
  5. Gram Flour - 2 cups
  6. Chilli Powder - 1 Table Spoon , 1 Tea spoon
  7. Garam Masala - 1/2 Tablespoon (Optional)
  8. Turmeric powder - 2 Teaspoons
  9. Asafoetida  (Hing) - 1 Tea Spoon
  10. Salt - As per your taste
  11. Coriander - 3 tablespoon
  12. Oil - 3 Tablespoons  and for deep frying
  13. Pav (White bun bread (not sweet)) - 10 pieces
  14. Butter
  15. Onion -2 

Procedure


Gram flour batter with spices


  1. Make a fine paste of ginger, garlic, and green chilies. Keep aside.
  2. Boil, peel, and mash potatoes.
  3. Add chili powder, garam masala, turmeric powder, and salt on mashed potatoes and mix properly.
  4. In a frying pan, heat 3 tablespoons of oil, once heated, add ginger-garlic-chili paste to it, fry for 2 mins.  Then add mashed potatoes mixed with dry spices (as mentioned in step 3) and fry well for 4-5 minutes. 
  5. Remove from heat and let it cool. Add cut coriander on it, mix and make small balls (vadas) of potato mixture. These are called Keep aside.
  6. In one bowl take gram flour, add a little turmeric powder,  asafoetida(hing), chili powder ( 1 teaspoon), and salt in it.  Add some water, mix, and make a thick paste. 
  7. Now heat oil in a pan. Once it is heated properly, dip potato balls in gram flour paste and then put them in oil to fry. Fry till it becomes golden yellow in color from all sides. 
  8. Give cut to the white bread buns  (pav) in the middle, apply butter inside and outside of the bread, and toast on the pan. 
  9. Serve fried potato vadas with toasted bread, green chilies, and cut onion.

Cucumber Salad (Vegan)

iSaltPepper: Cucumber Salad (Vegan)

Ingredients

  1. Cucumbers - (1 big or 2 small)
  2. Crushed (or coarse powder of)  roasted unsalted peanuts - 2 tablespoons
  3. Coriander Powder - 2 teaspoons
  4. Cumin Powder - 1 teaspoon
  5. Green chillies -2 (Optional)
  6. Mustard seeds - 1 teaspoon
  7. Oil - 1 tablespoon
  8. Salt - As per your taste
  9. Sugar - 1/2 teaspoon
  10. Coriander - 1 tablespoon

Procedure

  1. Wash and peel cucumbers.
  2. Cut cucumber in small square pieces. Take in a bowl.
  3. Add crushed peanuts, coriander powder, cumin powder, salt, and sugar.
  4. Cut green chillies in small pieces.
  5. In small pan heat oil, once it is hot add mustard seeds and green chillies. Fry chillies for 1 minute, remove the pan from heat.
  6. Pour oil with mustard seeds and chillies on cucumber mixture.
  7. Mix well.
  8. Garnish with coriander.

Simple Chicken Rice


Ingredients

  1. Rice - 1 cup
  2. Chicken - 250gm.
  3. Onions -2
  4. Tomato -1
  5. Ginger - 1 inch
  6. Garlic - 4/5 cloves
  7. Mint - small bunch
  8. 1cm Cinnamon stick
  9. Black pepper powder - 1 pinch
  10. Oil - 2 tablespoons
  11. Salt 
  12. Paprika / red chilli powder 
  13. Garam Masala - 1 teaspoon  (optional)
  14. Lemon juice - 1 teaspoon

Procedure

  1. Wash and soak rice in water for 30 mins.
  2. Wash chicken, drain water and marinate it with a little salt, chilli powder and lemon juice. Keep aside. 
  3. Cut onions and tomato into very small pieces.
  4. Make a ginger-garlic paste.
  5. Wash and finely chop mint and coriander.
  6. Take a pan, heat oil.
  7. Add a cinnamon stick and onion in the oil.
  8. Fry till onion becomes translucent.
  9. Add ginger-garlic paste and fry.
  10. Add chopped tomato and fry till tomatoes are cooked properly.
  11. Add chilli powder as per your taste, black pepper powder and garam masala. (Adding garam masala is optional).
  12. Mix it well.
  13. Now add chicken pieces and stir well so that chicken pieces are covered with onion-tomato-masala.
  14. Add salt as per your taste, add a half cup of water, cover pan with a lid and let the chicken cook for 5-7 minutes.
  15. Drain water from the rice, add rice in half-cooked chicken.
  16. Add mint leaves. Mix everything well.
  17. Add some water (till the level of water is 1 cm more than rice in the pan).
  18. Cover and let the rice cook slowly for 7-8 minutes.
  19. Switch off the gas, keep the lid on for 5 more minutes.
  20. Simple chicken rice is ready. 


Vegetarian Masala Toast Sandwich

iSaltPepper-Vegetarian Masala Toast Sandwich

Ingredients

  1. Medium size potatoes -2
  2. Ginger - 1/2 inch
  3. Garlic - 3 cloves
  4. Tomato -1
  5. Onion - 1
  6. Lemon -1
  7. Mint - small bunch
  8. Coriander -small bunch
  9. Bread slices -4
  10. Salt 
  11. Paprika / red chilli powder 
  12. Tomato sauce
  13. Cheese slices -2 (optional)
  14. Butter (optional)

Procedure

Prepare potato filling

  1. Boil and mash potatoes
  2. Make the ginger-garlic (2-cloves) mix paste. 
  3. Heat oil in a pan
  4. Add ginger-garlic paste, fry for 1 min, add mashed potatoes, salt and paprika as per your taste and mix well.
  5. Stir and fry for 2-3 mins.
  6. Garnish with some coriander

Prepare green chutney (optional)

  1. Wash and cut (by removing stems) mint and coriander
  2. In a mixer bowl take mint, coriander, 1 garlic clove, 1 teaspoon lemon juice, salt( as per your taste) and grind it to paste.
  3. Green chutney is ready

Sandwich

  1. Take 2 bread slices. Remove/cut sides if you like want.
  2. Apply butter on one side of each slice.
  3. On one slice spread green chutney (optional) 
  4. Then put a small portion of mashed potatoes on it and spread evenly.
  5. Put slices of tomato and onion on top of it.
  6. Put a slice of cheese on it. 
  7. On the other slice spread tomato sauce.
  8. Put this second slice on the first slice with potatoes in such a way that tomato sauce is on the inner side of the sandwich.
  9. Toast this sandwich on a pan with or without butter (Toasting is optional), cut it in triangles.
  10. Your vegetarian masala sandwich is ready. 
  11. With the remaining ingredients, you can make one more sandwich.


Introduction

iSaltPepper : Indian Cooking Out Of India


iSaltPepper
iSaltPepper: Indian cooking out of India


A collection of Indian food recipes using ingredients available in any typical European supermarket like Albert Heijn, Lidl.

Indian food does not mean only curries made with loads of spices. Indian food means simple tasty dishes made using easily available ingredients sprinkled with love. It's up to you how much salt, spice, and oil to use.

On this blog, you will find vegan, vegetarian and non-vegetarian dishes. The ingredients are tagged as European-grocery means the ingredients which are easily available in any Europen supermarkets and Indian-grocery means the ingredients that are available in any Indian supermarket.

Also, the recipes are classified as basic, medium and expert depending on the efforts needed to make it.

I hope you enjoy this collection of tried and tested recipes. Please subscribe and leave comments !!  Your suggestions are welcome !!